
Virtual Production

Assignment 1
Intro to Unreal
During my first week taking Virtual Production class at NYU as part of Integrated Digital Media Masters program before I began my journey on learning Unreal engine I started off by preparing my computer which took at least 3 hours. I cleaned up my desktop, I cleaned my files, and made space for all the new programs I would be downloading. I also made sure my computer operating system was up to date to handle all these softwares. As you see above, I made sure I had more then enough space and bought an external hard drive to get ready for these big project sizes.

After getting my computer prepared, I downloaded the Epic Games launcher to be able to download Unreal engine. Once I had downloaded both of those programs. I then received and error saying that Unreal engine couldn’t open because I didn’t have Xcode on my Mac. I found Xcode on Apple sites, downloaded it, and launched it for Unreal to finally open up. Another issue I ran into was that I originally downloaded unreal 5.3 and didn’t understand how to change the version. During the tutorial I think noticed you can change the version of Unreal by clicking the arrow, so I uninstalled 5.3 then finally reinstalled the correct version by clicking 5.2. I learned that you can have multiple versions of unreal downloaded at any point.

I was finally ready to dive into the tool, now since I am a total newbie I wanted to take it slow and take notes along the way as I learned how to use the tool. I pulled up a google doc to keep track of the one hour Tutorial on Unreal. I will be honest, I was worried and nervous that I wouldn’t get how to use this tool. So I went in with hesitation, but as I watched the tutorial, I realized it reminded me off some other tools I used like Spark AR and Unity. Another challenge I was having was that I didn’t have a mouse with me, so that made moving around in the view port harder. So I took this as way to watch the tutorials more so and play around slowly.
At first, I learned about the versioning, the library, the marketplace, and where to find all the projects. I started off by Launching the programs and choosing a game template in third person.

I then learned about the functionality and the overall lay of the land, I learned how to rotate, scale, add in assets from the content drawer. I even learned how to move around in this new built world. I also learned about how to import objects from Marketplace, how to import from other design programs and lastly how to merge two levels. I did struggle with the merging part and realized I needed to watch it another couple times to fully grasp the idea of how it works.

From here, I got to play around with how to see characters run around in third person and how to get them to run, jump and move around in this template space.

I then explored how to build a world complete on my own and how to add in a floor, how to add in a floor and how to set up my directional light. The lighting was also a challenge for me, and I knew I had to continue to practice more, I think the lack of having a mouse made it harder as well to add the direction for the light in correctly.
Reminder: Always use an external mouse when using any of these tools.

Because I am new I took the tutorial slower so I can take everything I learn in and that is my best advice to anyone learning Unreal Engine.
Take it slow! Be easy on yourself and practice as much as you can. The tutorial was a way for me to familiarize myself with the tool itself, play around and start to just understand how to use it in order to build the best creative worlds. I focused less on what I was creating and more on just learning the overall tools and how to play around.
Challenges
Overall some challenges I had were, learning to use the tool with just my mousepad, which I will not be doing moving forward, taking time to digest the information rather then doing it one sitting, and how to navigate the merging and lighting.
Marketplace Import Images

Completion of the Course


Assignment 2
Level design
For my second assignment for my Virtual Production class, I was tasked to create a world using starter kit elements. Since last week I struggled with Unreal engine, this time I made I focused on learning the tool first then practicing after. I made sure to spend abundance of time just taking in all the videos and learnings. I started off by following along the video tutorials. I explored how to start off with preset kit or be able to build my level completely on my own and add my own lighting (as you can see below).


From there, I started off with creating my floor and choosing a grass for my material to build out my landscape. I added detail by adding mountains and valleys.

After exploring with the grass I realized I wanted to build a concreate world and decided to change the material. I then started exploring with the foliage and started to think about what I wanted to place into my world.


I liked this idea of building a concreate world with different geometric shapes, I actually come from an Architecture background, so I love boxy shapes. From there, I started to explore different sizes and other shapes.

I then played around with the lighting and tried to think about what kind of lighting or mood I wanted to represent a moody city in a way along with adding different color shapes and patterns.


Lastly, I played around with adding some mountains on the bottom layer and again playing around with the color to make it even more moody! Overall, I had a better experience this week, my computer worked better and I enjoyed everything I learned in Unreal - I think taking it slow and giving my self couple days to really soak in the information and really helped.


Assignment 3
Character Creation
For this third project, we had to look into different character creation tools such as: Ready Player Me, Maximo, or any other avatar creation too. I had fun with this assignment and explored outfits, hair style and accessories. I had used Maximo in the past, but hadn’t used Ready Player Me so decided to choose that one for this project. I started by uploading a photo of myself and as you can see it created a character that looked similar to me.


From here, I had to think about our brainstorm mood board and find a look that fit that story. Our story takes place past midnight and in the East Village. So the outfit with the yellow skit and black top felt most fitting to me for someone being out in the town in the East Village. From here I thought about designing one more new character which is the Lizard from the story.

After that, I decided to recreate my scene this time creating a scene that would be off New York City in the East Village at Night, I used concreate for the floor and added bushes for some greener, while then adding different materials on the buildings.

I then explored the lighting in the scene to give it a more moody vibe and landed on the glowing city.


After the new world was built, I continued on to get the characters ready for Unreal. I did actually struggled a bit at first getting the characters exported properly, but ended up figuring it out.

From there I exported the character from ready player me added the ARKit and then imported her into Blender to rexport and be able to get ready for Unreal Engine.


From there, I started to think about the animations I wanted in my story, because there’s a Lizard abduction. I think the character will need to run, stand idle, fight, and maybe in dodge from the light or the scary being that came down from the Sky. I grabbed all these animations now without skin to import them into Unreal. At this point I couldn’t bring the character into Unreal because my computer kept crashing. After getting a new computer :) I was finally able to add my characters in which some are running, the lizard is pointing at the open that’s being levitated up into the space ship.


Assignment 4
Materials, Quixel Building Scene, Adding in Motion Capture
I started off this weeks assignment by diving more into how to create Materials and I learned the basic fundamentals. I did this by diving into the Unreal videos on Materials. I learned the characteristics of materials which are: base color, roughness, Metal, specular value.

Unreal Engine demo
Then the tutorial walked me through the material editor, and dove into how to use the blueprints map, along with creating materials and how to test this in a map with both dark and light map. I learned how the material editor works learned about: the menu system, edit, reference viewer and how to audit assets. From there, I learned how to create a material and material instance from scratch through the different function options.

After that I went back to my scene and started choosing props to decorate it more with Quxiel. First thing I wanted to add were different materials and more buildings that looked liked from the East Village. I looked up buildings and what was available to me and found a few that different brick materials. I also added side walks, and added in construction orange signs.


I explored adding different foliage and grass as well. From there I switched over to pulling in the motion capture into my scene. I moved over to Blender and imported my character in T-pose and then imported the animation I had recorded in the Motion Captures studio. From there I was able to import it back into Unreal and that’s where I needed to to stop for this assignment :)


From there, I went back into the scene to film the scene and think about the perfect angels and thought about scenography to come up with this:


After thinking about the scenography, I made sure to take photos that had the lizard animal be in the third+ section of the screen keeping in mind rule of thirds. I also took a lot of shots where the angle was from below and behind the Lizard Animal to give it that power and make everyone seem weaker. It also showed the different sizes of the people vs the Lizard and how they can easily step on them at any moment. The movement showed the lizard being super relaxed and just showing it pointing to the other person being lifted into the sky while everyone is running around scared. One of the photos shows the leading lines of the people running into the darkness.
For the video, I started off further back to set the stage of the scene then zoomed more into what’s actually happening to build suspense in the scene. Then I zoom in and only focus on the two main characters to give them the focus which now showcase everything that’s going on. I also set the scene and show the space around and how the characters fit in. The leading lines of the side walks help the viewer to understand there’s more around.

Assignment 5
Retargeting, Long Takes
For this weeks assignment, I picked back up on the retargeting part. I started off by exporting my character from Mixamo in a T-pose. From there, I removed all the meshes and just focused on the bones. I then reimported my animation in.

I officially got my animation in and into Unreal engine ready to go! From there, I played with the squeezer to create a short movie of my dark city and the lizard alien abducting the girl.

Midterm
Moodboard, Character, and Storyboard
For my Midterm project, I started off with exploring ideas around storylines or visuals I love. I originally had studied Architecture in my undergrad, so I appreciate brutalism architecture and sets. So the mood board I built was based off the a few shows: Squid Games and Severance which you can see the colorful maze like set and the office set along with lots of photos of repetitive patterns and odd shaped buildings. This also got me thinking on the type of story I wanted to create. I want to create a mysterious world where we don’t know what the location is.

From there, I went into thinking about what kind of shots I wanted in my midterm, I appreciate West Anderson style of shooting , So I will have character shots from the front, and I will study his films to get more inspriation.

After that I looked at color schemes, tones and hues, for the project and pulled a view that I loved.

After that, I started thinking about the story more. And came up with the storyline below, where we only see two characters, we see parts of there rooms, they are connected but they will never meet. And we don’t know where this world is or what is consists off. The last scene will show a far away shot on how they fit into the world but with lots of open ended questions.

My characters consisted off two which will be a man and women who are wearing outspace style gear, but we don’t necessarily know if that’s where we are. I wanted to be a bit mysterious with the looks as well. I made to also bring diversity with the characters by having one wearing a hijab.

Afterwards, I started digging for assets for that would help tell this story. I found some models of the backrooms, which give the same vibe I was looking for but the hues/tones need to change to match the colorway I picked. It gives the idea of the maze and emptiness and a never ending world.


From there, I also found another free asset that feels more modern and space like whspaceich I could use as well as a home, and delete everything in the surroundings, along with a city view from upto.


After that, I spent time downloading all these marketplace assets into my Unreal engine and focused on understanding the lay of the land. After that I started playing around with the scenes itself and updating them and changing things around to match my storyboard. Since my mood board was more airy and less dark, I updated the walls, lights, and at ceiling to give it a whole new vibe, a bit more muted and airy, and found a color scheme that matched my characters more.


From there, I focused on the characters itself and tried to understand what kind of animations they needed. I download 5-6 animations from mixamo for each player which consisted off: idle, running, walking, distressed, tired, and more. After that, I got the characters ready to go in Unreal engine with the meshes and animations. Next, I wanted to merge the worlds into one, but one was built for night time vs one was built for day time. So I wanted to make sure that they both were shot during the day, so I removed the night lighting and the box around the world. Landing at a world that’s all in one.

After I got my world ready, I focused on the building the movie, which I spent a good amount of time doing. I first created a 30 second scene of the mans world, showing him and then showing everything in the maze and then switching over to the womens. From there, I explore ways on how to show different parts of the maze. I wanted to give a feeling of uneasiness and helplessness, so I made the video/cuts quick and short and shaky to give that aesthetic that we are running around the maze.
Week 9
Story Creation, Asset Collection, Set up Computer
For this weeks project, we started off by doing a creative exercise to gather random words into an excel spreadsheet to then use to be able to create our next story. The words I contributed to the story were: Sandy, California, and Tank.

From here, I was put into groups with Zoe and Lisha and we came with a story about Spongebob and Sandy on the hunt for Patrick in the world of Las Vegas.
The story pulls together different cartoon realities and bring in humor and along with joy and darkness and a happy ending. Read the story below

After that we started to pull together assets in one place. Here are some that I gathered for the story


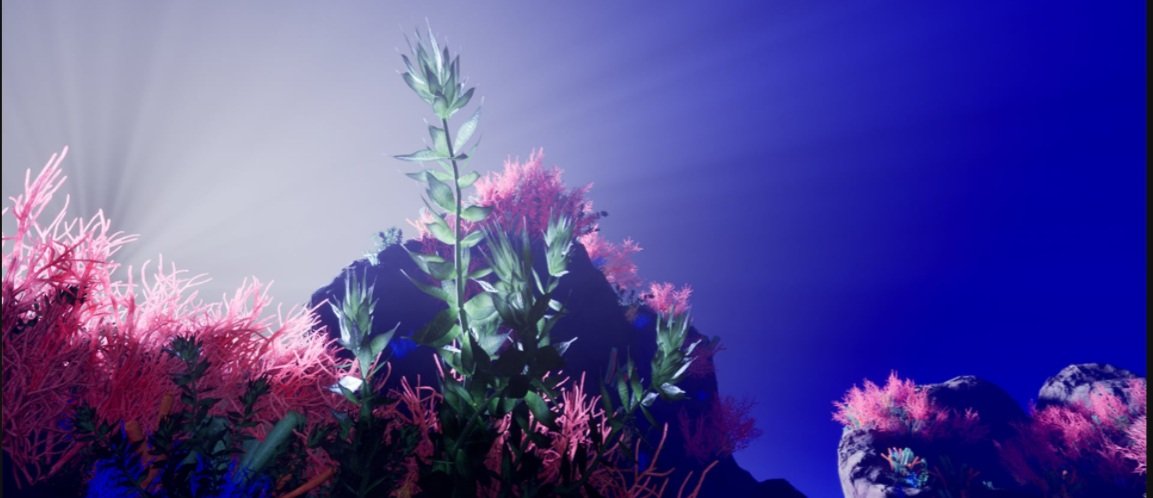


Frist off, I choose a bunch of different under the water assets so we can collect assets from different ones to create the first act of the story off where Spongebob and Sandy find that Patrick is missing. Then I found a squirrel for Sandy, along with a starfish for Patrick, lastly I then found a town that is broken down and dark for the second half of the movie where they try to find Patrick.

Week 11
FInal Project Preparation
For this weeks assignment, I am working through figuring out my final project elements. The four parts I need to work are:
Motion capture: Sponge bob is scattered in the mountains
Inside of New York Casino
A Halloween trolley that is rolling down a track
Buffet where there is a comically large stack of hardboiled eggs
For the Inside of the New York Casino, I found these assets below which are 3 different casino scenes that are all $9.99


After that, I looked into other assets for A buffet where there is a comically large stack or hardboiled eggs.


And then I looked for assets for: A halloween trolley that is rolling down a track


Week 12
Project updates & iPad Virtual Camera
For this week, I have continued to work on my project. For these items here is my progress:
Motion capture: Sponge bob is scattered in the mountains - Filmed the motion capture now need to get it ready to put into Unreal
Inside of New York Casino - Added into Unreal engine into the project
A Halloween trolley that is rolling down a track - Downloaded the trolly so far
Buffet where there is a comically large stack of hardboiled eggs - downloaded the egg, table and other food assets.


Final Project
Week 13
For this week, I needed to finish all my tasks for the final, here is the breakdown of the process for these tasks:
Motion capture: Sponge bob is scattered in the mountains
Last week I filmed 5 different clips of motion capture already
These clips insisted of running from one side to another
Going in circles and dodging things coming towards Spongebob’s way
Running diagonally
And then just running randomly and being scattered all around
So for this week, I needed to retarget the animations into the Spongebob character. I went into Motion builder, imported Spongebog. Then I brought in the motion animation, from there I had to go through and match each bone with the proper hip, hand etc. Once I did that, I needed to make sure I characterized the bones, made sure I zero’d out to rotation to make the T pose, and lastly, morph the bones and character together.
Once I did that, I saved the file and then brought it into my own game sandbox. Where I got a chance to test the animation and see if it worked, once I did that. I then moved the animations into the class file - but migrating it over, and then opening the class file and submitting the changes.
After that I opened up the Night time desert and placed the Spongebob’s running into the hills in havoc.
When I was in the night time desert Spongebob was hat was missing it’s material so I had to bring that in while I also needed to trim the animations so the walking was removed in the beginning.


After that, my next task was:
Inside of New York Casino
I had already tested the casino asset in my own sandbox last week, but for some reason it wasn’t showing into the class file, so I had to completely delete all the class folders and have them be updated/uploladed all again.
This process took about 45 minutes to an hour for all the folders to come in.
I re-migrated over the level into the class file, and then went into the file and submitted the changes.
I asked Tainy to test if my casino file showed up, and it didn’t so then I realized I had to go back in and reupload it and test it out again. Which I did one more time.
After that, I worked on setting up actors and labeled them VPRoot0, VPRoot1, etc in different parts of the casino to get it ready to go for the shoot day.
This time it finally worked and this task has been completed.


My next task is:
Halloween trolley that is rolling down a track
I had found and downloaded the trolley already last week so I started to then decorate the trolley.
I started to search for elements that would make the trolley look like a Halloween trolley, I found a pumpkins on Quixel which I put on top of the trolley.
Then I found a skeleton on sketchfab for free, which I then used to put infront and the back of the trolley.
From here, I uploaded it migrated the file into the class file, for Tainy to add in lights and add the motion in.
The next part of of adding the animation, Tainy started off by making a blueprint, then added a spline which added the track to it, created a track in the world for it, for the trolley to move in.
From here, we figured out where the tunnel and the Las Vegas maps are in order to place them into the scene.


My last task entailed:
Buffet where there is a comically large stack of hardboiled eggs
I had already downloaded the egg, table and other food assets from SketchFab and Quixel
I needed to then bring in all the assets into my own unreal file to set up the scene
I started off by adding a Props folder within the assets folder to create a blueprint
I then brought all the assets in had downloaded and exploring how I want the table to look and feel
I played around with the table size, and adding different foods onto the table
I then migrated the blueprint over to the class file
Lastly, I found where the table fits into the scene which was the night time desert where Sandy would trip over the table.


On the day of filming, I got a chance to direct the the class to be able to film the story and here is some behind the scenes photos from the filming day :)
What I learned:
How to calibrate the suits and gloves
How to get everyone in sync
Blocking the script out and getting the cast prepared
Asking the team to get ready before hand


